Hey makers! 👋
You asked—we listened! Many of you told us you wanted more control over your prints, and we’re excited to deliver just that. With our latest update, REALvision Online now includes advanced settings, giving you the power to customize your prints like never before.
From the beginning, REALvision Online has been built with one goal: to make 3D printing simple and beginner-friendly. We believe slicing software shouldn’t be complicated—and that anyone, regardless of experience, should be able to start printing with confidence. But we also know that as you grow, so do your needs.
That’s why we’ve added a new Advanced Settings option—so you can dig deeper when you’re ready, without being overwhelmed when you’re not.
Simple when you want it, advanced when you need it
REALvision Online has always made slicing easy and approachable. But now, when you’re ready to take the next step, you can turn on our Advanced Settings to access a whole new layer of options.
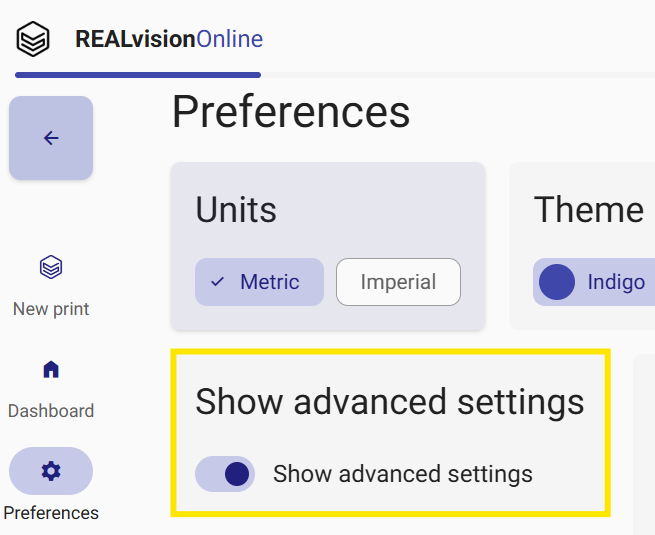
By default, these settings are hidden—keeping things clean and simple. But after a few prints, you’ll get a gentle nudge inviting you to explore more. When you’re ready, just head over to the Preferences tab and flip the switch.
Let’s break down what’s new and why it matters 👇

Object settings: shape your prints, your way
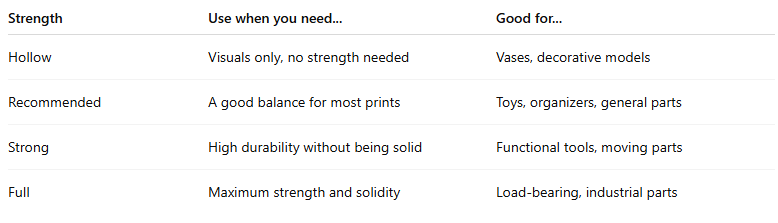
Object strength
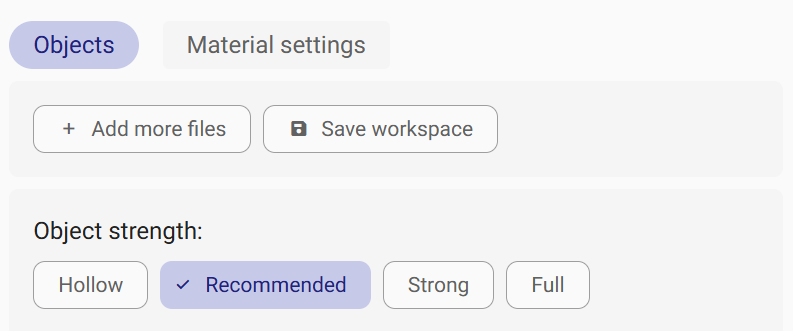
Want stronger prints? Or maybe you’re printing something decorative and want to save filament? With these new options, you’re in control:
In the Object strength menu you can choose from Hollow, Recommended, Strong, or Full to match your print’s purpose.
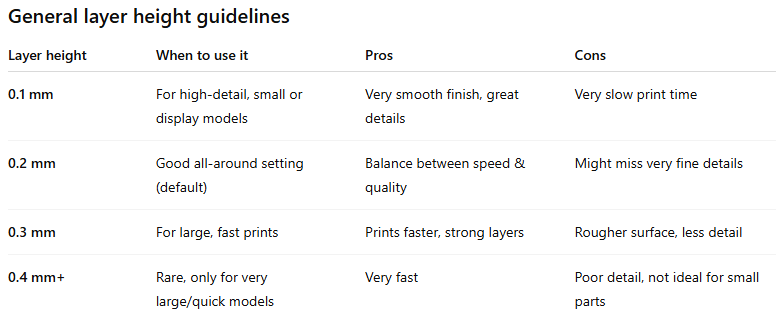
Layer height
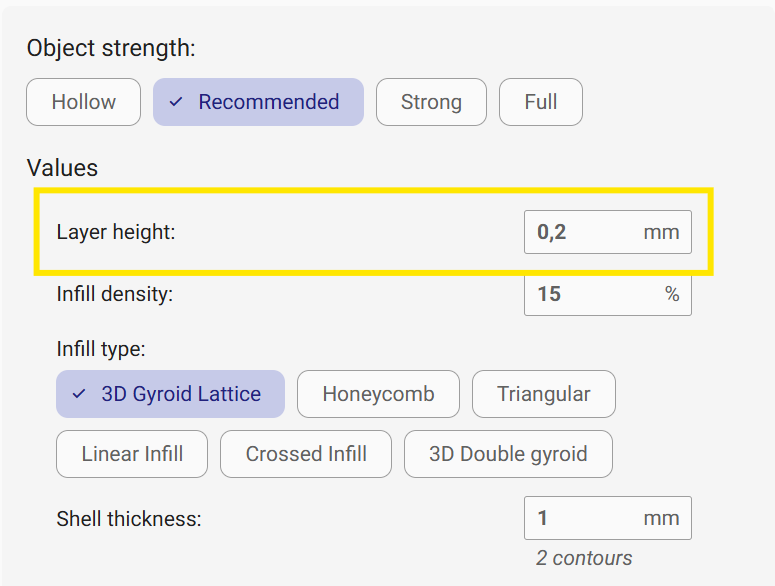
Layer height is the vertical thickness of each printed layer. It’s usually measured in millimeters (mm), like 0.1 mm, 0.2 mm, etc.
Smaller layer height = finer detail, smoother surfaces
Larger layer height = faster prints, less detail.
Smaller layer height will give thinner layers and can improve the surface quality of detailed objects, but will increase the print time. With larger layer height you can print faster, but with less precision in the details.
Infill density & type
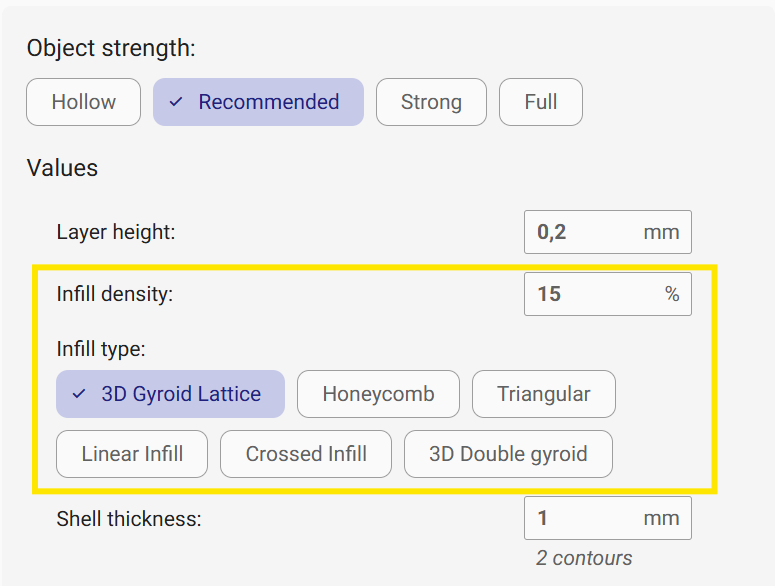
Control how solid your print is and choose patterns like gyroid, honeycomb, triangular, linear, and more.
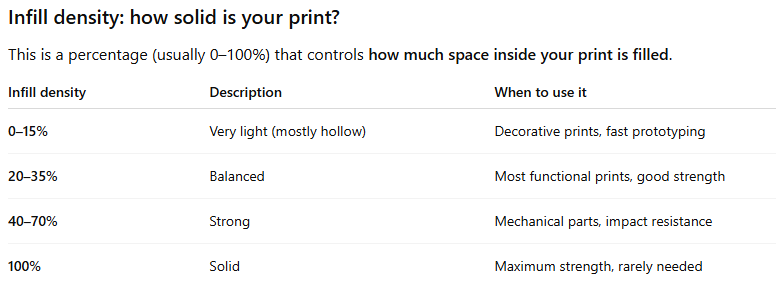
Infill density is a percentage (usually 0–100%) that controls how much space inside your print is filled, how solid is your print.
Lower density = faster, lighter, uses less filament
Higher density = stronger, heavier, uses more filament and time
Lower density will give a lighter object that is fast to print and uses less material, while with higher density you will get a heavier object that is slower to print and uses more material.
Infill type (pattern) affects how strong, flexible, or stable your print is — even if you keep the same density. It is basically how the inside of your print is built.
In the Infill type section you can choose from 3D Gyroid Lattice, Honeycomb, Triangular, Linear Infill, Crossed Infill and 3D Double Gyroid. Read more about the different infill types here [Coming soon!].
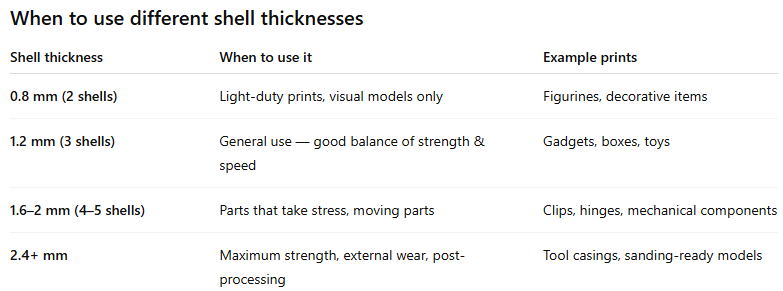
Shell thickness
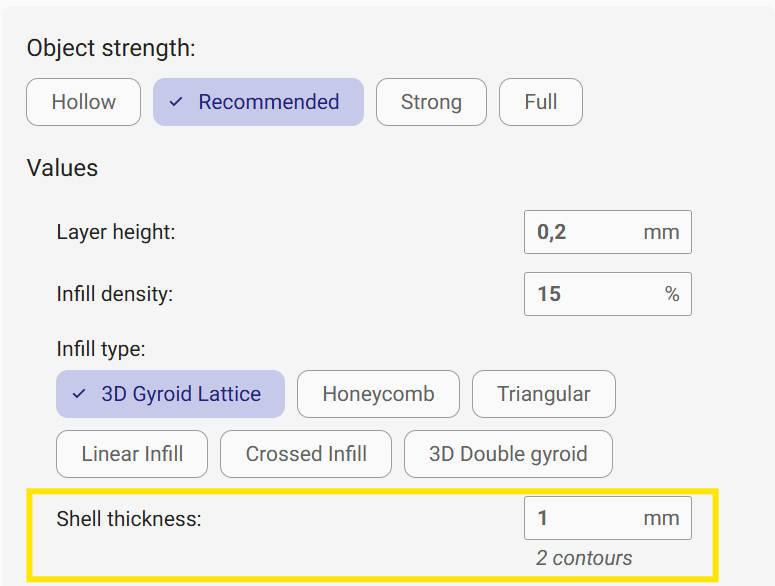
Shell thickness (also called wall thickness) controls how thick the outer layers of your print are — the vertical walls that form the visible outside of the object.
It’s usually measured in millimeters (mm) and is based on your printer’s nozzle diameter. For example, if you have a 0.4 mm nozzle, one “shell” is 0.4 mm thick. So:
0.8 mm = 2 shells
1.2 mm = 3 shells, etc.
Why does shell thickness matter?
The shells are the first line of defense for your print. They give it shape, strength, and durability — especially on the outside where parts are handled, pressed, or exposed to stress.
More shell thickness =
– Better strength
– More impact resistance
– Less chance of cracking
– Smoother outer surface (sometimes)
Less shell thickness =
– Faster prints
– Less material use
– Weaker outer walls
Pro tip:
A thicker shell is especially useful for thin-walled objects, where infill doesn’t do much. You can also combine strong shells with low infill to get a sturdy part that’s still lightweight.
Bed adhesion
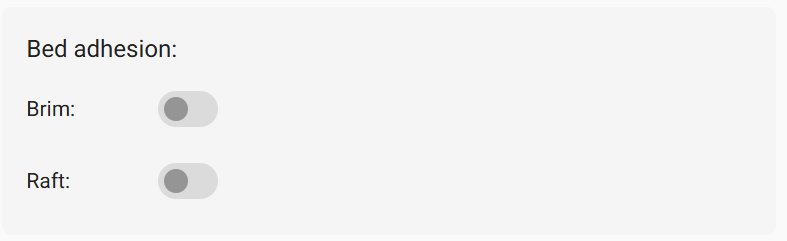
Brim
A brim adds extra lines of plastic around the base of your object, like a little skirt that’s attached to the model. It’s only one layer thick and easy to remove.
When to use a brim:
– For parts with small contact areas
– To prevent warping of corners or edges
– When you want easy removal and minimal material use
Pros:
– Uses less material
– Prints faster than a raft
– Easy to remove and doesn’t affect the bottom of the model
Raft
A raft is a thick, flat base that your print sits on — like a foundation under the whole object. It consists of multiple layers and separates your model from the actual print bed.
When to use a raft:
– When bed adhesion is really poor
– For warped materials like ABS
– When your print needs extra stability during the first layers
Pros:
– Strongest adhesion option
– Can help compensate for an imperfect bed
– Reduces warping on difficult materials
Cons:
– Uses more filament
– Takes longer to print
– Leaves a rough bottom surface and may require more cleanup
By now you know how to fine-tune your objects. Are you ready to take it a step further? Explore the new advanced material settings in REALvision Online here.
Designed for growth
We know it can be intimidating to dive into all these options at once. That’s why we’ve kept them neatly tucked away unless you choose to explore. With this update, REALvision Online grows with you—from beginner to budding print expert.
So whether you’re printing cosplay props, custom parts, or your next invention, these new tools are here to help you experiment, learn, and level up.
Ready to try it out?
Head over to the Preferences tab in REALvision Online and enable Advanced Settings. Play around, tweak a few things, and see what kind of magic you can make. 🔧✨
Happy printing!
– The REALvision Online Team