Have you just bought a 3D printer, you are beginner in 3D printing and need some quick directions on how to get started? Follow 6 easy steps for converting STL files to G-code format and read some basic terms below which you need to understand about the 3D printing technology whether you are a hobbyist or want to create prototypes for manufacturing.
Here are the steps on how to convert your first STL file into G-code file that your 3D printer can understand.
Click the video to see a 2 mins tutorial on how you convert STL file format into G-code format.
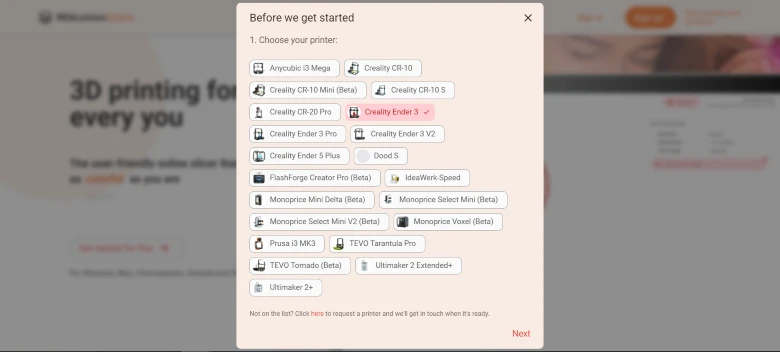
1. Choose your printer
For many slicer software tools, you first need to download and install the software, but since REALvision Online is a browser based slicer software, you can jump right in.
Go to realvisiononline.com and click any of the “get started” buttons. You will first be asked to choose your printer. If your machine is not on the list, you can request it on the link below the printers. We are constantly adding more 3D printers, so it is definitely worth it.
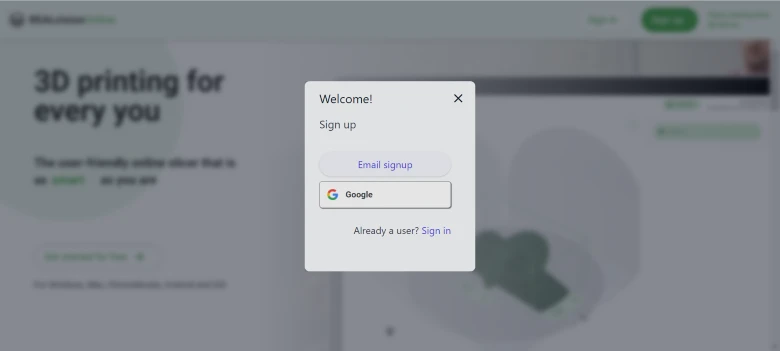
2. Sign up to REALvision Online
The next step is to create a profile. If you have a Google account, you can sign in fast. Otherwise, choose email sign-up.
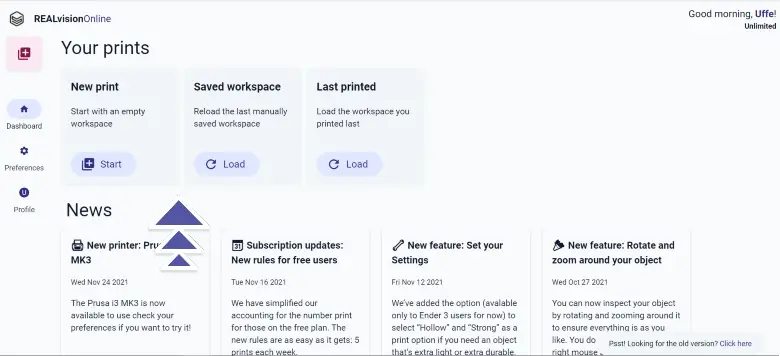
3. Start a new print
You will enter to your dashboard, where you can start a new print. When you have made your first print, it is automatically saved and visible as your last printed option.
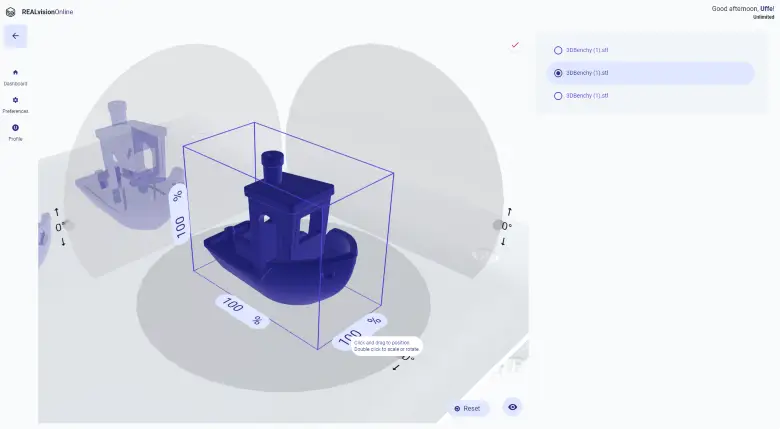
4. Place your model in the workspace
When starting a new print, you will begin at the workspace area. Here you can see the print bed. You click on the bed or drag your file to upload it. Once your 3D model is on the plate you can easily rotate and scale it by double clicking on the object.
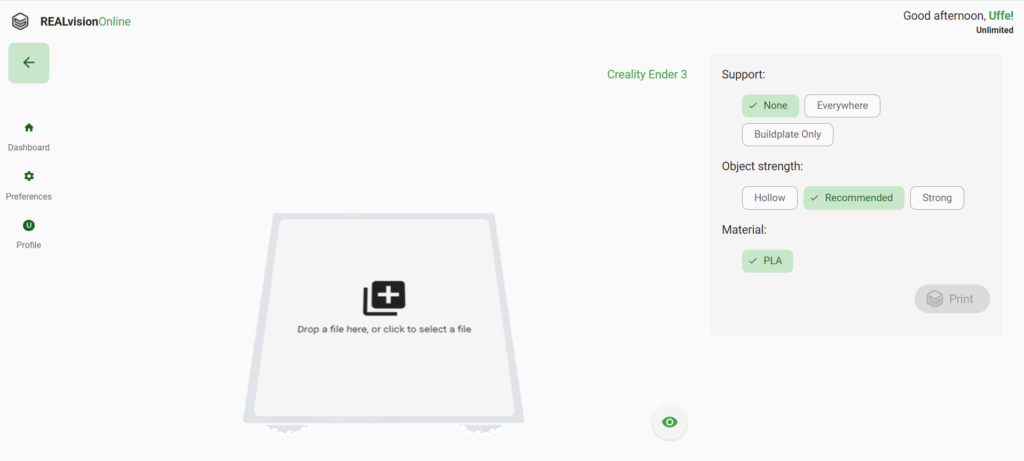
5. Set your printer settings
In most cases, you don’t need to set any settings, as the recommended setting will be the best suited. However, if you need support or change in some of the other parameters, you click the settings tab to the right to see the options for your printer.

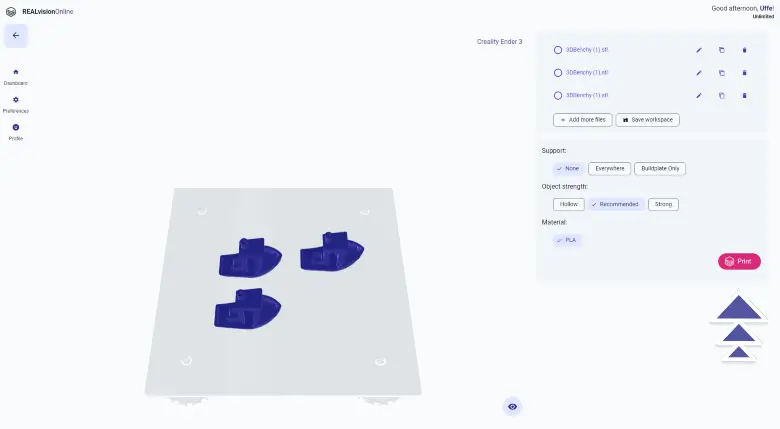
6. Slice your object into G-code
When you are happy with the settings, you click the print button in the right corner. You will see that your file is being sliced. After a few seconds, you can see the print time and the amount of filament you need to finish the print.
Just below, you find the download button, click for exporting your G-code file. Once your file is exported it is time to put it on an SD card and insert it into your 3D printer and let the magic happen.
What are STL and G-code files?
STL file format is a file type used to describe a 3D model of an object. It is an abbreviation of “Standard Triangle Language”, aka “Stereolithography” and it consists of mathematical terms expressing a 3D object. They are usually created and can be read by a CAD software. 3D printers cannot read this language, therefore STL files need to be turned into G-code format. G-code files describe the 3D design of an object sliced into layers. 3D printers read this file and use this information to print the objects layer by layer.
What is a slicer software?
To convert an STL file to G-code format, you need to use a 3D printing software which is called a slicer software. It is a CAM software that defines the instructions your 3D printer needs to follow to print the object. That is why you will get a different outcome depending on which slicer you use.
REALvision Online is a browser-based easy-to-use slicer software that turns STL files into G-code files on any device for several types of 3D printers to give you the best possible result.
What is the difference between a good and a lousy STL to the G-code converter?
The obvious answer would depend on whether you get a good print in the end. There are many good slicers out there. However, you should avoid slicers where you cannot choose your printer and material.
The reason for this is that all 3D printers are built differently. Therefore, your slicer needs to know which printer you have and whether you are printing in PLA, ABS, or other material to communicate correctly with your printer and optimize the result. So if you can’t choose your printer and profile, you shall use another STL to G-code converter.
Just looking at the different features it can be hard to see the difference among the different slicers. However, if you try a few of them you will find that there is a difference in print speed and quality of your print. This is due to the calculations running in the background. At REALvision Online we had a high focus on improving the print speed, therefore REALvision Online is twice as fast as most other slicers.
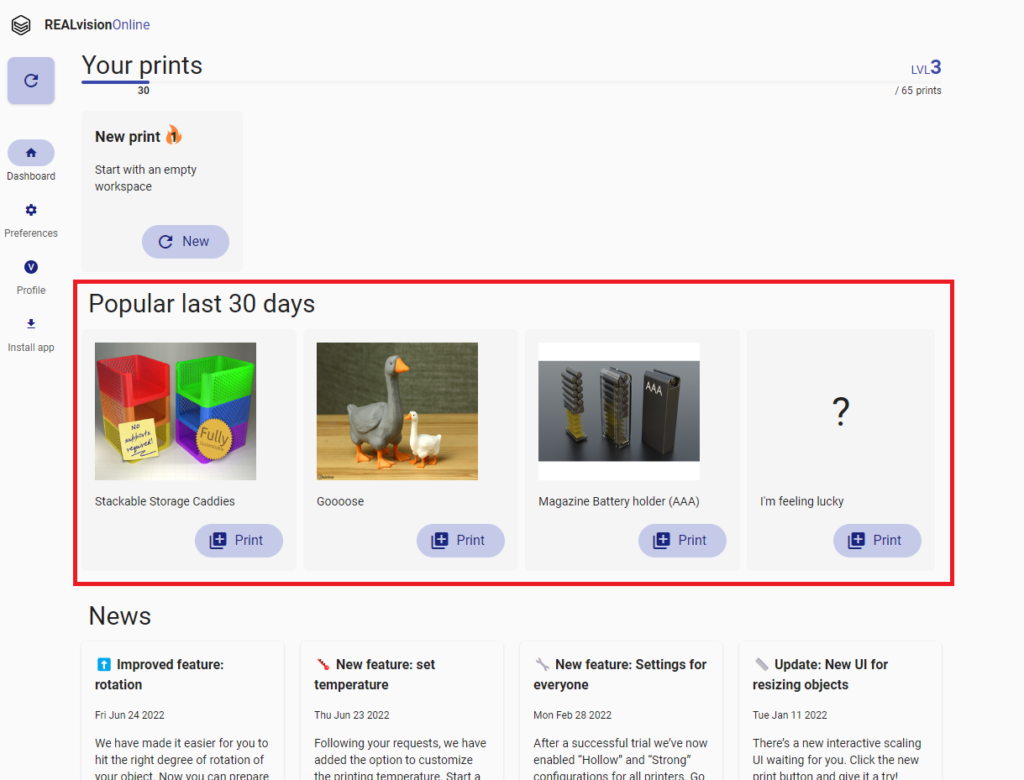
What to print next?
First of all, as an inspiration, you can see our “Popular last 30 days” section. If you feel adventurous you can also try the “I´m feeling lucky” option. You can also print from my 5 favorite print ideas for starters.
You can also find a great variety of free 3D models on marketplaces such as Makerbot Thingiverse. If you can`t find what you are looking for you can of course also design your own 3D model.
However, as a beginner, you might not be familiar with the different CAD softwares and it can be a nice piece of cake to learn them from the basics. But it doesn’t mean that you cannot make your ideas real. With intuitive modeling programs like Tinkercad or FreeCAD you can create your 3D models from scratch without any designing experience for free, and you are ready to print your 3D objects! In this article, you can find a complete guide on how to get started with designing, including tips and tools you can use to make your visualization real.
Do you have a picture of what you would like to create? You can transform 2D images to 3D STL files with easy importing with Selva3D. You can find more 3D modeling software like it in this article.
If you would like to read more about additive manufacturing and all the different 3D printing technologies such as FDM, SLA, MSLA, DLP, SLS, DMLS, SLM, EBM, material jetting, DOD, binder jetting, and more, I recommend this article which gives you a very good overview of the different processes and materials available.
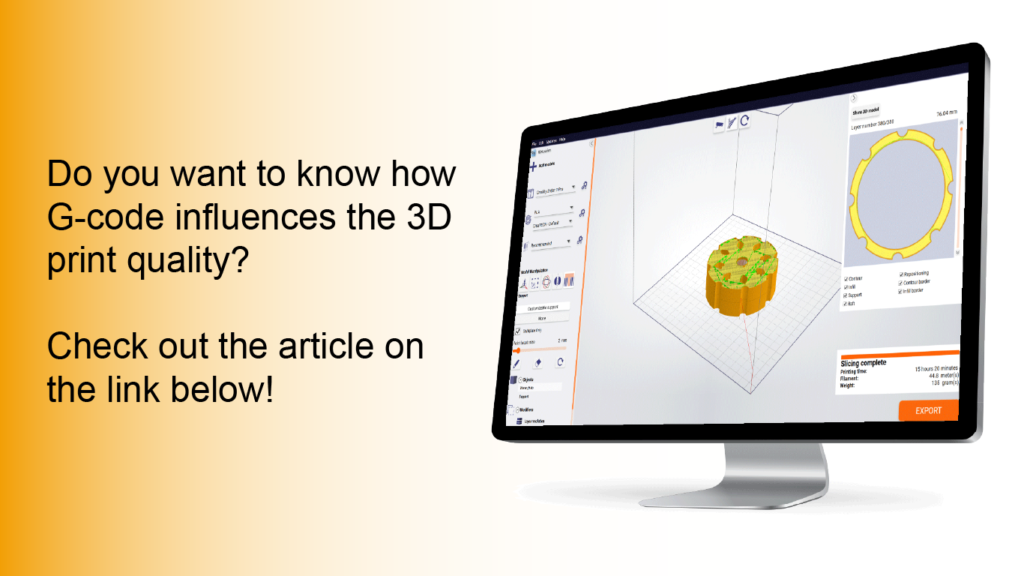
Read the article about G-codes
Good to know – General terms related to 3d printing
| 3D printers If you have bought a cheap desktop 3D printer like an FDM printer from Creality but you are not satisfied with the quality of the Creality slicer, then you are not the only one. Historically those printers were sold as kits for 3D printer enthusiasts developing 3D printers themselves such as the reprap project. Today most 3D printer enthusiasts just want to spend time on printing and not on fixing the 3D printer. This is why slicing and the slicing software are a big part of the success of 3D printing. |
| Filament In Fused Filament Deposition technology, also known as Fused Filament Fabrication, the spool of filament is the material used to build the 3D part by melting the plastic out of the nozzle of the 3D printer. The printer extrudes the filament line by line, layer by layer, by increasing the z axis, and will build the 3D printed part. |
| STL files STL files are three-dimensional geometries CAD files based on a list of triangles defining the wireframe or the outside shell of the 3D object geometry. There are two types of STL files: they can be ASCII or Binary. The binary STL file-format is more size optimized (takes less byte size) while the Ascii STL file-format is human readable (can be opened in a text-editor) and defines the tessellation (list of triangles creating the 3D polygon). To define a triangle the STL file format is a list of triangles made from 3 vertex or 3D vectors. Of course, there are a lot of triangles and they are fairly small so those triangles next to each other define the meshes of your STL 3D print file. |
| CAD / 3D CAD softwares CAD stands for Computer Aided Design, it is the software part of CAD-CAM solution where you create your 3D designs or more precisely create your 3D models (actual 3D geometries). You can use beginner CAD software like Tinkercad, Google Sketchup, or more advanced CAD software like Autodesk Inventor, using Solidworks, 3DS, Autocad, or even parametric CAD design software like Openscad (script-based CAD software). All CAD software can export a CAD file under different file formats, but without a doubt, the most popular one is the STL file format. |
| GCODE files Gcode files are the files used for 3D printing. There are two types of Gcode files they can be ASCII or Binary, the Ascii files have a bigger file size and are human readable, while binary files are not human readable. You can easily preview an Ascii Gcode instruction by opening it in a text editor. The file extension or file format is .gcode and is generated from a CAM software usually named a slicer. |
| CAM / Slicer 3D printing software A CAM software in 3D printing is most commonly called a slicer. Slicers are used to create Gcode files. For beginner and intermediate users, you can use online slicers like the online slicer REALvision online; or for expert users, you can use slicers like REALvision Pro, Cura, Ultimaker Cura, Simplify 3D, Creality slicer or Slic3r. A slicer lets you manipulate the STL and then takes a planar cut or cross-section cut of your STL 3D design and automatically generates the movement instruction of your 3D printer (the toolpath) as well as all the repositioning and print strategy of the 3D printer. The filename generated from the slicer or CAM is called a GCODE file and the file-format is a .gcode. You can usually simulate the 3D print result by looking at a slicer 3D viewer. |
| A CAD-CAM solution which is a combination of creating a 3D design, preparing the manufacturing of the part and ultimately automatically manufacturing the party using an FDM 3D printer or a 3D printing service (like Shapeways, 3Dwarehouse |
| 3D printing Services To print 3D files you can use printing 3D files services such as Shapeways or Materialise. You can upload your STL files and they will ship your 3d prints to your home for a fee. |
| Marketplace If you are not confident in designing your STL 3D files yourself you can download a lot of STL files for free on websites like Thingiverse or Cult 3D where there are thousands of free STL files to choose from. |